Use Case
The aim of this project is to develop a modelling method with the ADOxx Metamodelling Platform 1.5 that supports automatic package delivery by providing models to manage and organize a self-driving vehicle and the packages which have to be delivered to the customers visually, as well as to calculate and display the most efficient route for the drop-offs.
The whole project consists of the following two use cases:
1. Importing data for the calculations
First, all required data (such as the delivery address) need to be provided in order to calculate the most efficient route and order respectively for delivering the packages to the customers. To achieve this, an ADOxx modelling method was developed that allows to model a particular transporter as well as the packages and customers. Relevant data can then be added as an attribute of an object.
2. Calculating the optimal route
The second use case builds upon the first one, since the calculation of the optimal route is based on the information gathered before. In this use case, the most efficient route for the transporter is being calculated by using the Google Maps API. After the order of the waypoints is determined, a new model will be automatically generated in ADOxx that displays the route.
Experiment
Implementation in ADOxx
For this project, a new library was created and can be imported into the ADOxx Development Toolkit. It consists of the following classes and relation classes, which are going to be described later on in greater detail:
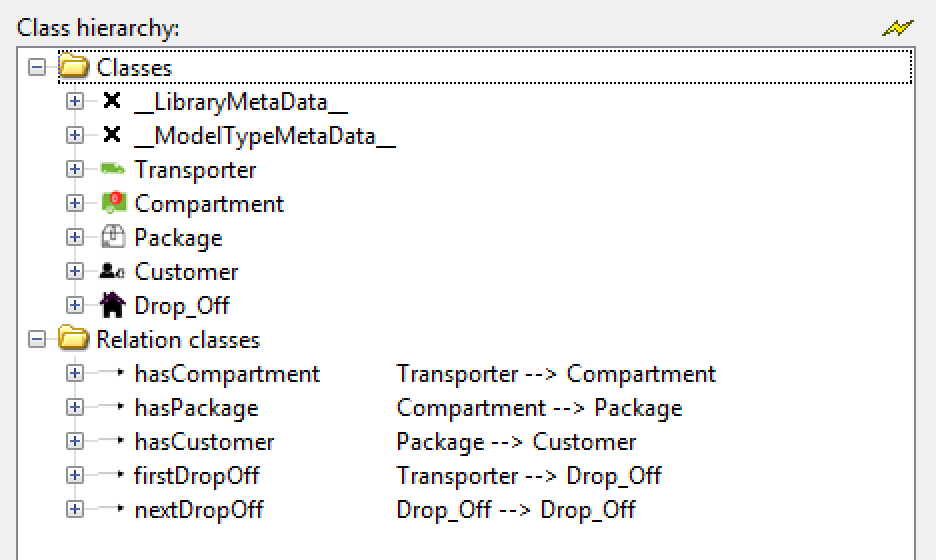
Two different types of models are available – the Cargo Model and the Optimal Route Model. Both models, as well as all modelling procedures and their concrete realization, are explained in the following.
Cargo Model
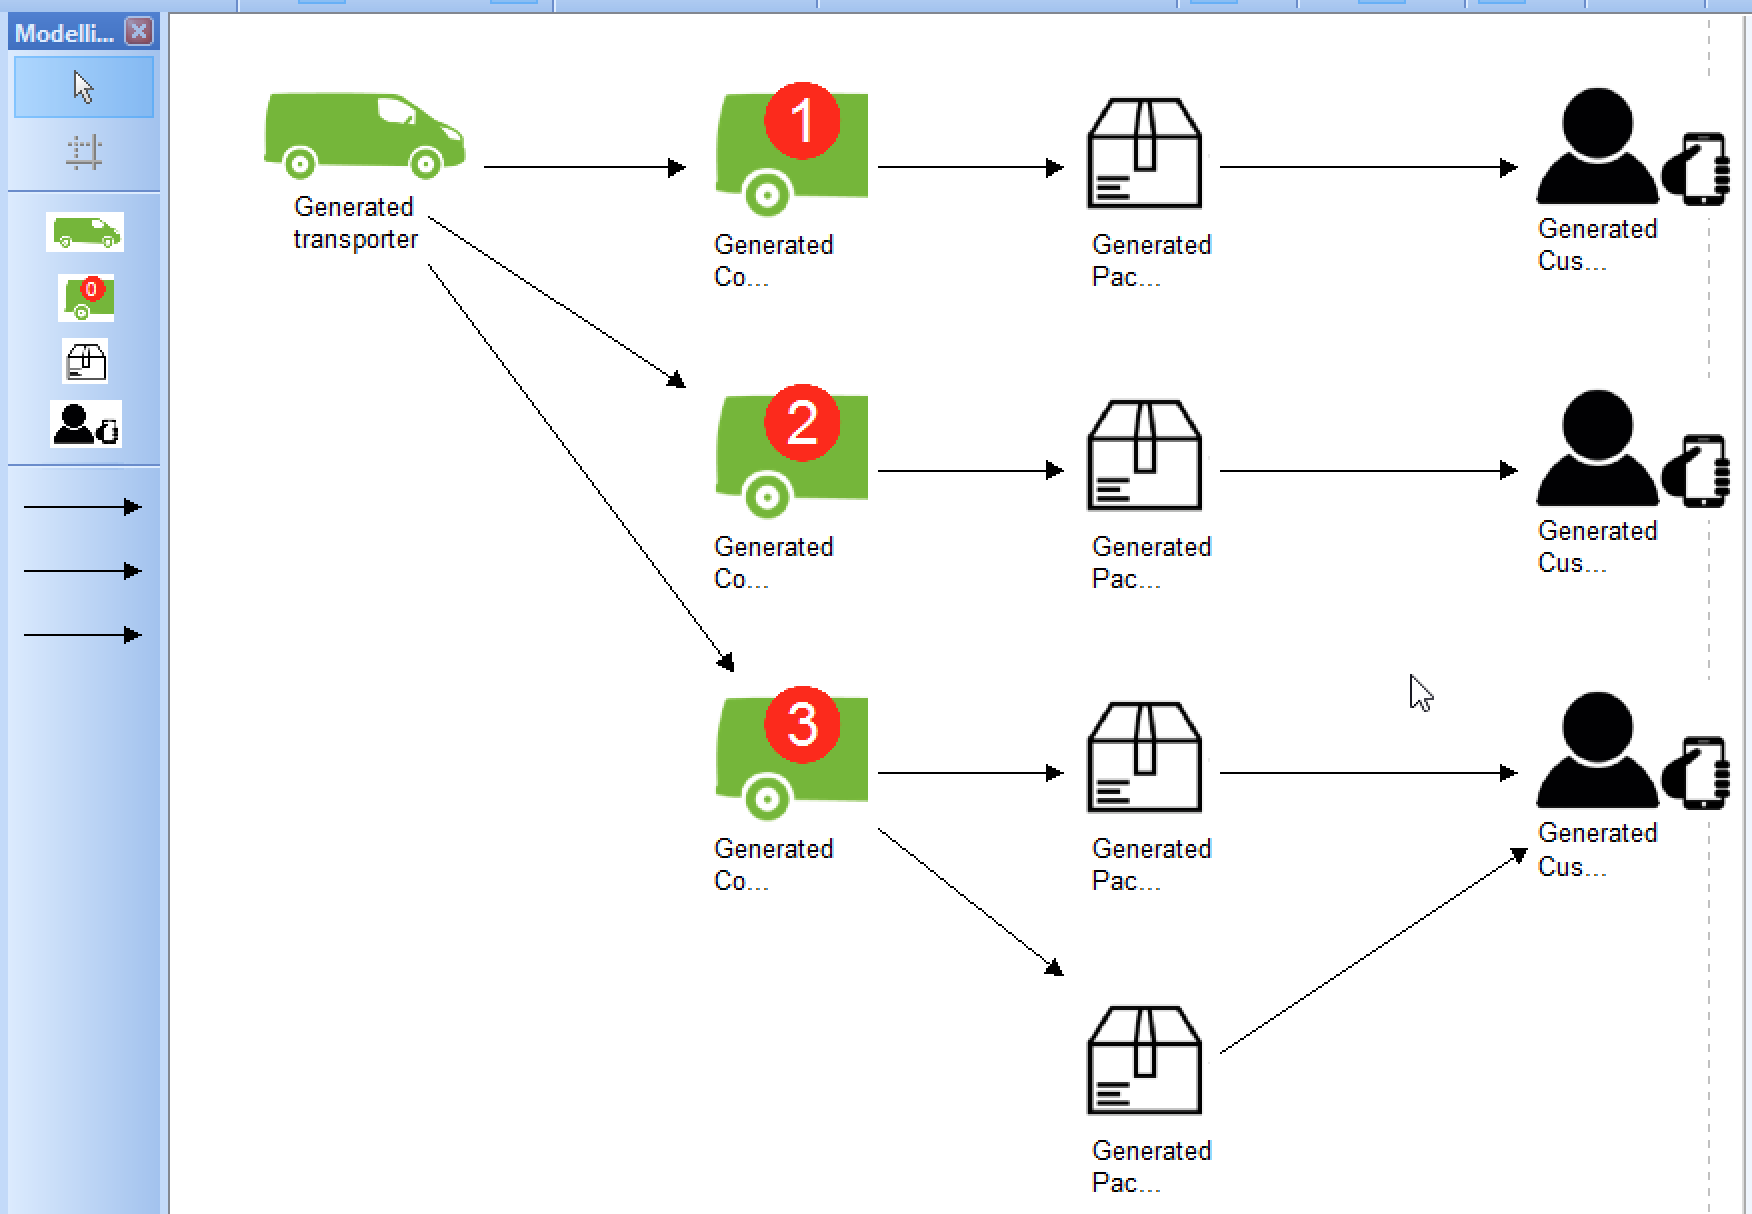
The Cargo Model allows to model a particular transporter and the cargo that is supposed to be shipped to the customers. Its aim is to visualize all relevant information regarding the delivery and looks as shown below:
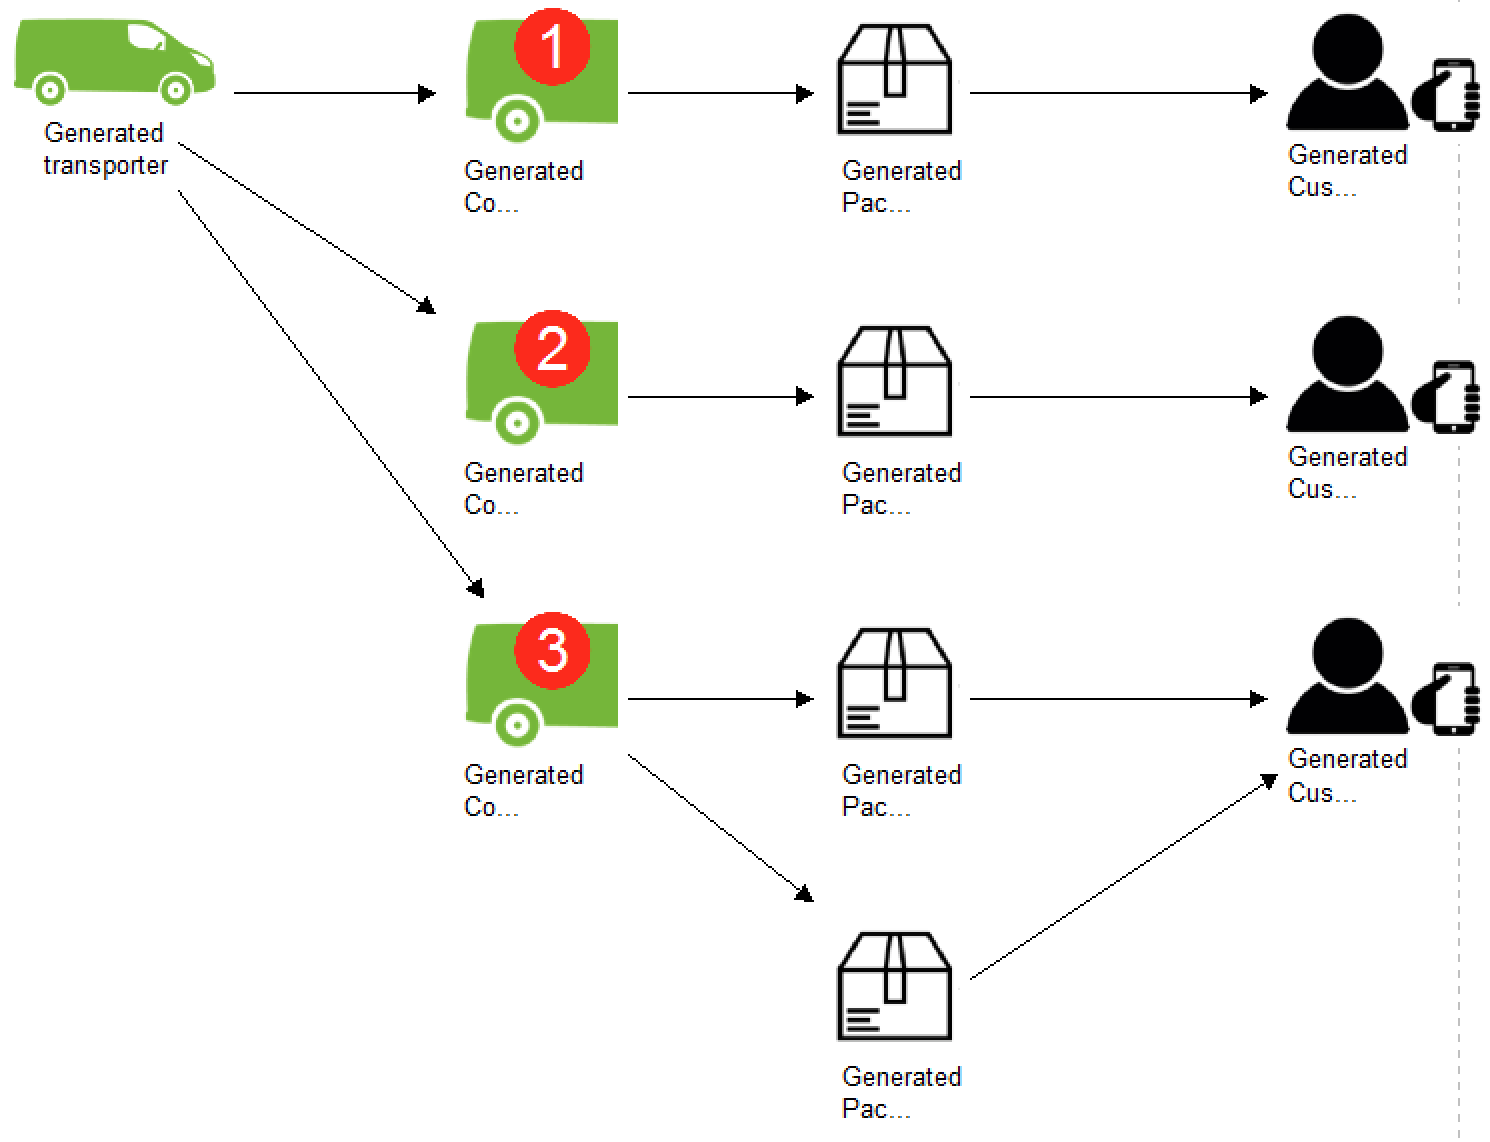
The model has four classes:
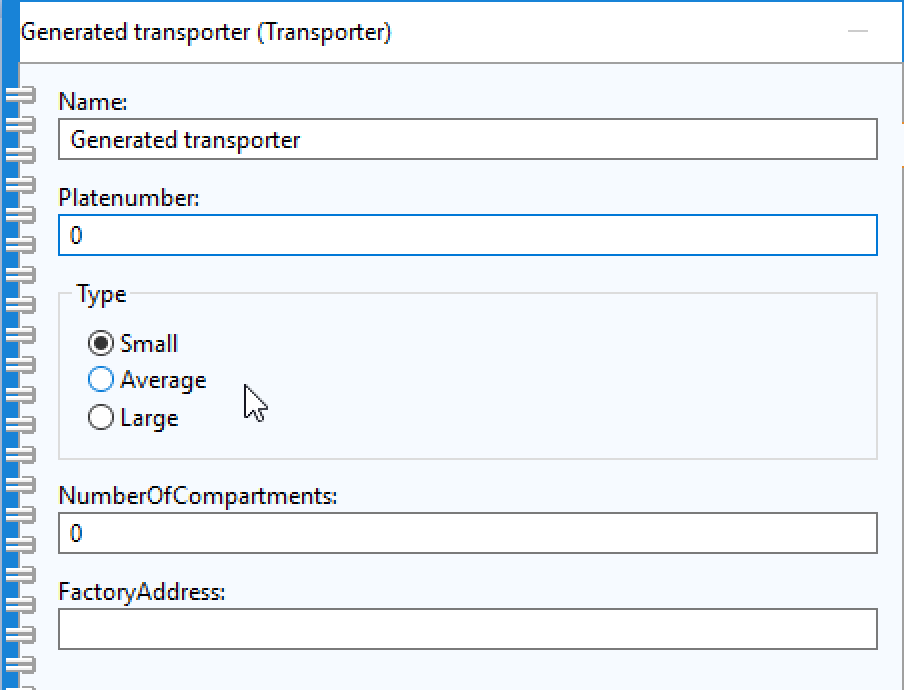
– The Transporter class represents the self-driving package transporter and has the following attributes:
– The Compartment class represents one of many compartments of the transporter. In this project, it is assumed that the package(s) ordered by a customer are stored in one compartment. Every compartment has its own security-lock, which the customer can later unlock by entering a pin code into the keypad. When the transporter arrives at the delivery address, a code that unlocks the compartment is generated automatically and sent to the customer. The class has the following attributes:
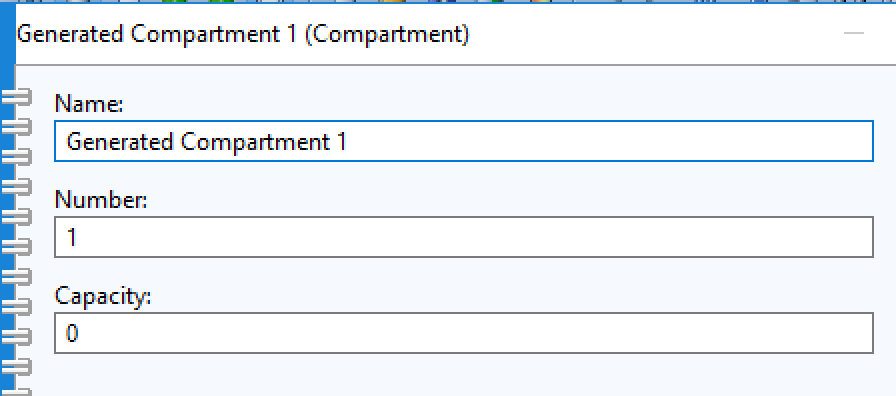
Note that the graphical notation of this class is dynamic – the number of the compartment is visualized in the red circle and will change depending on the attribute ‘Number’.
– The Package class represents the packaged good that is going to be shipped and has the following attributes:
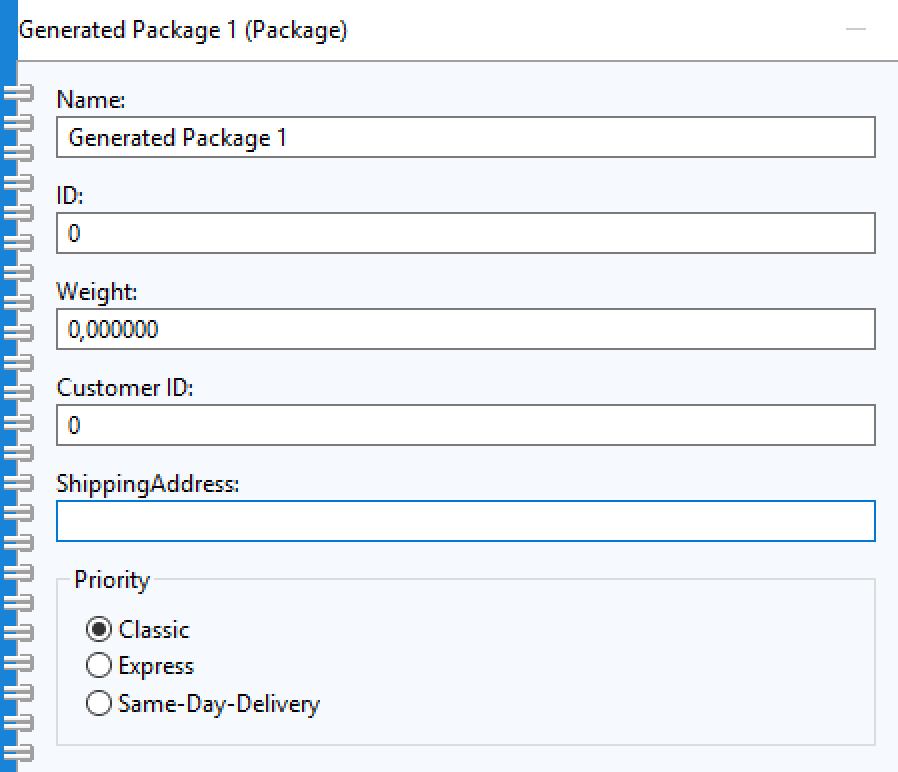
– The Customer class represents the customer who ordered the package and has the following attributes:
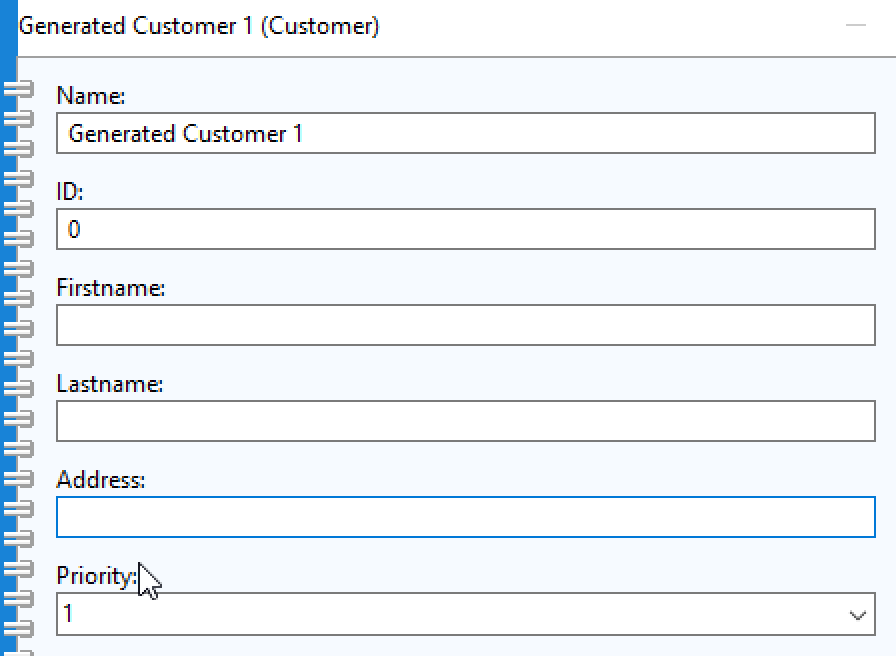
In this model type, there is solely one relation class, which is symbolized as a simple arrow that points to one direction. Purpose of the model is to show the composition of the transporter and its cargo, and all the relevant information of both the packages and customers that is needed to calculate the optimal route. The indicated direction of the arrow shows which class is part of another class: A transporter can have several compartments, and those compartments can store several packages. The relation between a package and a customer shows to whom the package belongs to and where it is going to be shipped to respectively. The relation class itself doesn’t have any attributes.
Create Default Cargo Model
Within the Cargo Model, the modelling procedure Create Default Cargo Model, which can be found under the menu item Go, can be executed. It will trigger an AdoScript, which will automatically create a complete, user defined model with correctly aligned relations.
In the script, the current model id is determined (it is therefore important to have a Cargo Model currently opened when executing the modelling procedure, otherwise an error message will pop up).
CC "Modeling" GET_ACT_MODEL
SETL m: (modelid)
CC "Core" GET_MODEL_MODELTYPE modelid:(m)
IF ((modeltype) != "Cargo Model") {
CC "AdoScript" ERRORBOX ("This is not a Cargo Model. Please open a Cargo Model.")
}
Then, an edit box is used that allows the user to enter the amount of compartments, the number is stored in a variable for later use:
CC "AdoScript" EDITBOX text:(amount_compartments_string)
title:"How many compartments of the tranpsorter to you want to fill?"
oktext:"Submit"
IF (endbutton = "ok") {
SET amount_compartments_string:(text)
}
CC "AdoScript" INFOBOX ("You've chosen " + amount_compartments_string + " compartments.")
SET amount_compartments:(VAL (amount_compartments_string))
For every compartment, the user can enter the amount of packages that should be stored. Every input is stored in an array with the length equal to the total number of compartments:
SET comp_array:(array(amount_compartments))
FOR i from:0 to:(amount_compartments-1) {
CC "AdoScript" INFOBOX ("In the next step choose the number of packages for compartment: " + (STR (i+1)))
CC "AdoScript" EDITBOX text:(amount_packages_string)

title:("How many packages would you like to put into the compartment?")

oktext:"Submit"
IF (endbutton = "ok") {

SET amount_packages_string:(text)

}
CC "AdoScript" INFOBOX ("You've chosen " + amount_packages_string + " package(s) for compartment: " + (STR (i+1)))
SET amount_packages:(VAL (amount_packages_string))
SET comp_array[i]:(amount_packages)
The rest of the script uses mainly Modeling commands to draw the objects based on the user input.
Optimal Route Model
This model type visualizes the route and the order in which the packages should be dropped off respectively. The model consists of 2 classes only: The Transporter class (which is the same as used in the Cargo Model) and the Drop-Off class. The latter represents the residence of the customer to which the package should be delivered to, and has one attribute besides the name – ‘Address’.

Implementation of calculating the route
To calculate the route from the Cargo Model, a web page was implemented using JavaScript. The complete Cargo Model first needs to be exported as XML file and uploaded to a server (in this project the almighty server is used) in the same folder as the index.html file. Accessing the web page, the interface looks as follows:

By clicking the Read XML File button, the XML file is read in and the XML elements are accessed using HTML DOM:
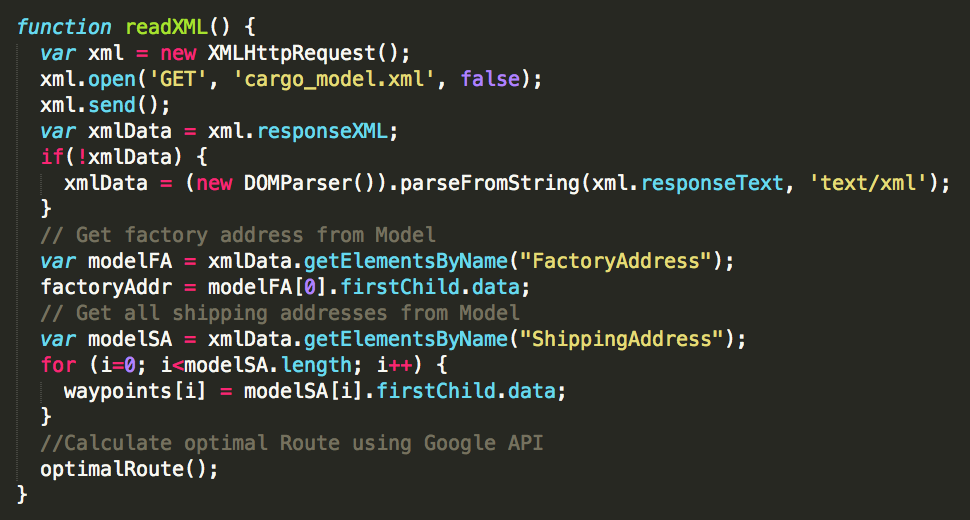
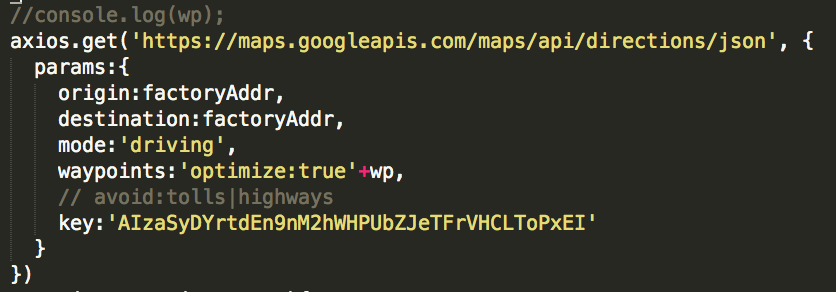
Both the factory address and all shipping addresses are saved into variables for later processing, whereas the shipping addresses are saved into an array. The functino optimalRoute() is called, which uses the Google Maps API to calculate the route:
The now correct order of the waypoints is stored into a new array and an AdoScript is created as string:
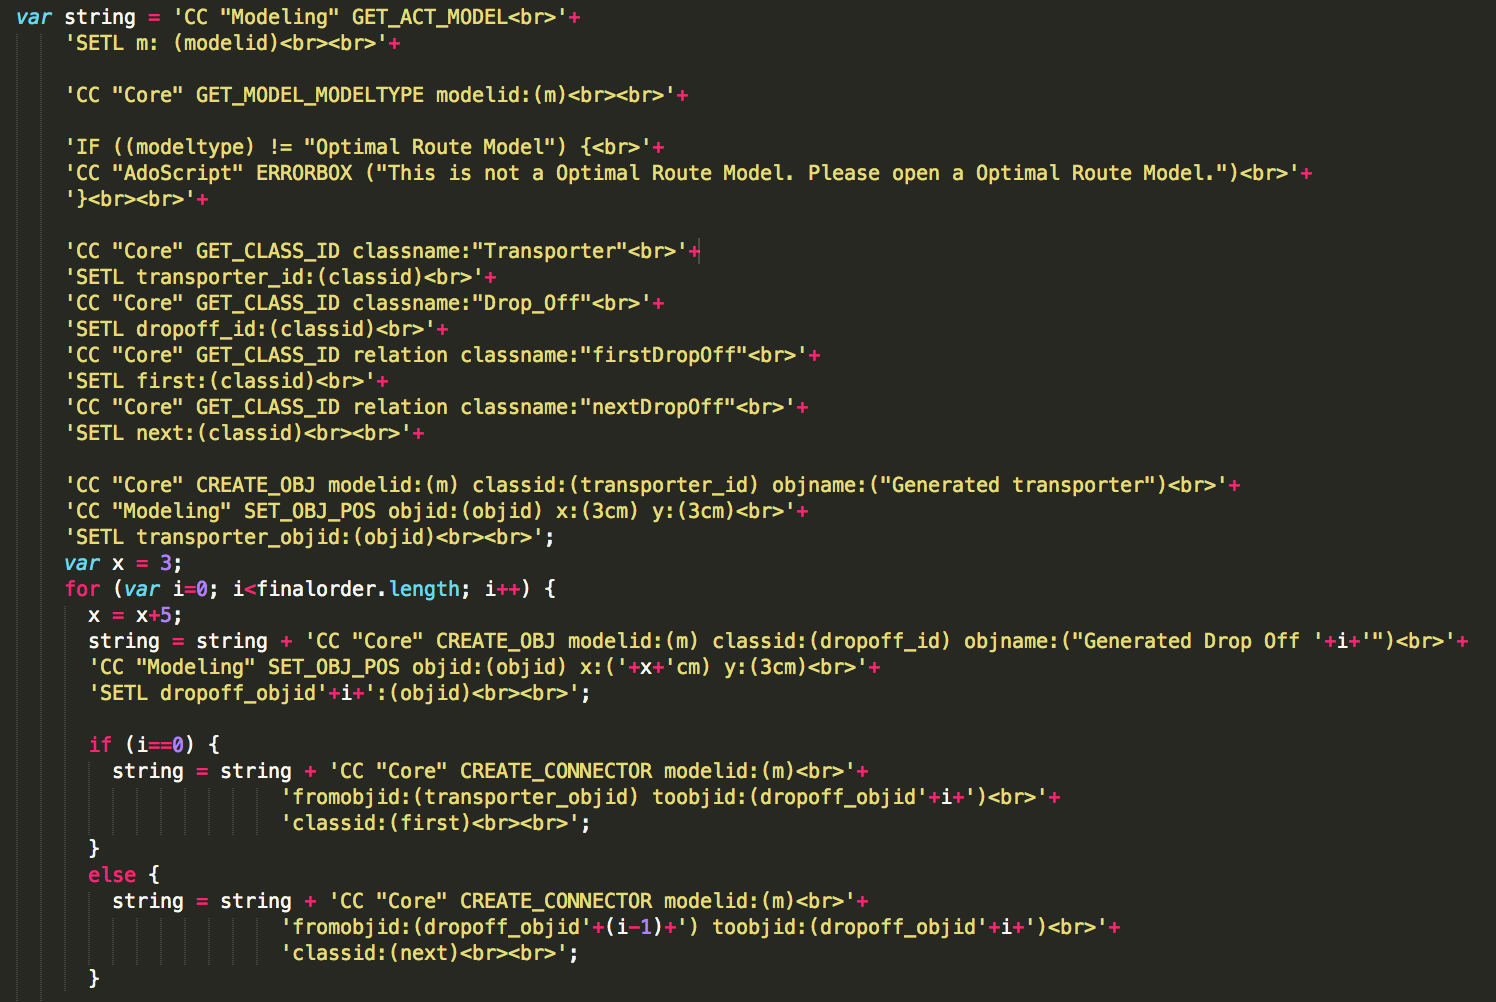
The AdoScript can create new objects (one Transporter and the Drop-Offs) and connects each Drop-Off point with the other objects in the corresponding order of the route. The script can be copied from the web page and saved to execute it within the ADOxx Modeling Toolkit. Calculating and creating the Optimal Route Model will be illustrated in the screencast below.
Results
To illustrate the results of this project, a screencast where all functionalities are shown as in a step-by-step tutorial is provided below. The objective was to first model the transporter and its cargo (Cargo Model) and then calculate the moste efficient route from it using the Google Maps API, as well as generate a second model (Optimal Route Model) from it that visualizes the route as last step.
Agenda
- Create a new Cargo Model.
- Execute theCreate Default Cargo Modelprocedure to auto-generate the objects.
- Fill in the shipping addresses of the packages as well as the factory address of the transporter in the already existing Cargo Model.
- Save and export the Cargo Model as XML file.
- Upload the index.html as well as the XML file of the model to the almighty server. Create a new folder in the already existingpublic_htmlfolder and save both files there.
- Open your browser of choice and access http://wwwlab.cs.univie.ac.at/~a//index.html
- Click onRead XML File. From the XML file of the model, an AdoScript will be generated and shown on the web page that can create and model the final route in the ADOxx platform.
- Copy the script and paste it into a new file in an editor. Save it as’createRoute.asc’.
- Go back to the ADOxx modeling platform and create a new Optimal Route Model.
- Execute the procedureGo > Create Route Model.Based on the XML file from the Cargo Model, the route will be automatically created and displayed.
Additionally, a complete Optimal Route Model can be exported as XML file and transformed into a RDF file as follows:
- Download the xsl file for transforming an XML to RDF athttp://www.gac-grid.org/project-products/Software/XML2RDF.html
- Make sure the XML file of the Optimal Route Model and the .xsl file in the same folder.
- Open your terminal and navigate to the folder.
- Use the following command to transform the XML file into RDF:
xsltproc xml2rdf3.xsl route.xml > test.rdfThis will create a new test.rdf file in the folder, which contains the transformed data.
Issues and Possible Future Work
The main problem with the project currently is that many work-arounds have been made to simulate the functionalities. Ideally, all steps should be fully automated in the future. The issues in the present project are mainly concerning the automatic creation of the route, as the Cargo Model needs to be exported as XML file first and then inconveniently uploaded to the server with the index.html. Also, after the correct order of the waypoints was determined and the script is shown on the web page, the script needs to be saved as .asc file and can only then be executed within the ADOxx modelling tool to generate the Optimal Route Model.
A potential starting point to extend and more importantly improve this project is to use the ADOxx Web Service (using SOAP), which allows to interact with the platform remotely. By calling the web service, it is possible to execute AdoScript code from another application. Ideally, once a Cargo Model is created, the web service is called by an application to retrieve the attribute values of the addresses for further processing (calculating the order of the waypoints using the Google Maps API). After the route is calculated, the web service is called again to execute an AdoScript that automatically generates the corresponding Optimal Route Model.
Further information to the Web Service can be found at https://www.adoxx.org/live/aodxx-web-service?. In the current project, a modeling procedure to start and stop the Web Service is already implemented (directly in the library under Library attributes > Add-ons > External coupling at the very end). It can be accessed through the menu item ADOxx Web-Service. Both starting and stopping the web service works fine. However, all attempts to call the ADOxx web service to execute AdoScript code have failed so far (therefore the inconvenient workarounds in the project).
