Use Case
This project targets to implement a system that enables to control a cyber-physical-system (CPS) with gestures.
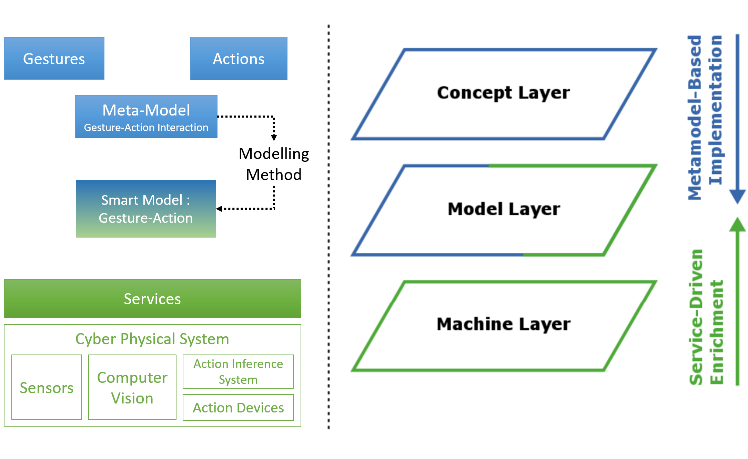
The cyber-physical-system will utilize smart models to act autonomously. In our case a smart model refers to a knowledge-based model which can be processed by the CPS. Based on the gesture input the CPS receives, the CPS can derive the necessary actions it needs to perform from the smart model.
The CPS itself consists of multiple components. Via services it can consume smart models. With the help of sensors and computer vision modules it can capture and interpret gesture images. The action inference system derives the required action for a given gesture-input. The action devices are then invoked to perform some change in the physical world. A modelling method enables to model the interactions, but also transform them into models interpretable by the CPS.
Use Case 1: Creation of Smart Models for gesture-action interaction design
Use Case 2: Building a Classifier for identifiying a selected range of static hand-gestures
Use Case 3: Live-Recognition of gestures and carrying out corresponding actions as per the interaction design
Experiment
Project Repository
The project’s source code can be found here. In addition to the source code, detailed descriptions on how to install the required libraries can also be found here.
Modelling Method
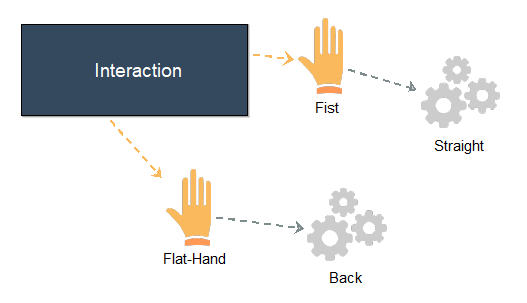
One aim is to design interactions of gestures and actions on a conceptual level, which then through transformations can be processed by a CPS. ADOxx has been chosen to create a modelling method, which enables to map gestures to desired actions. These models can then be exported as an ontology (RDF/XML). Likewise, existing models can be imported for further changes.
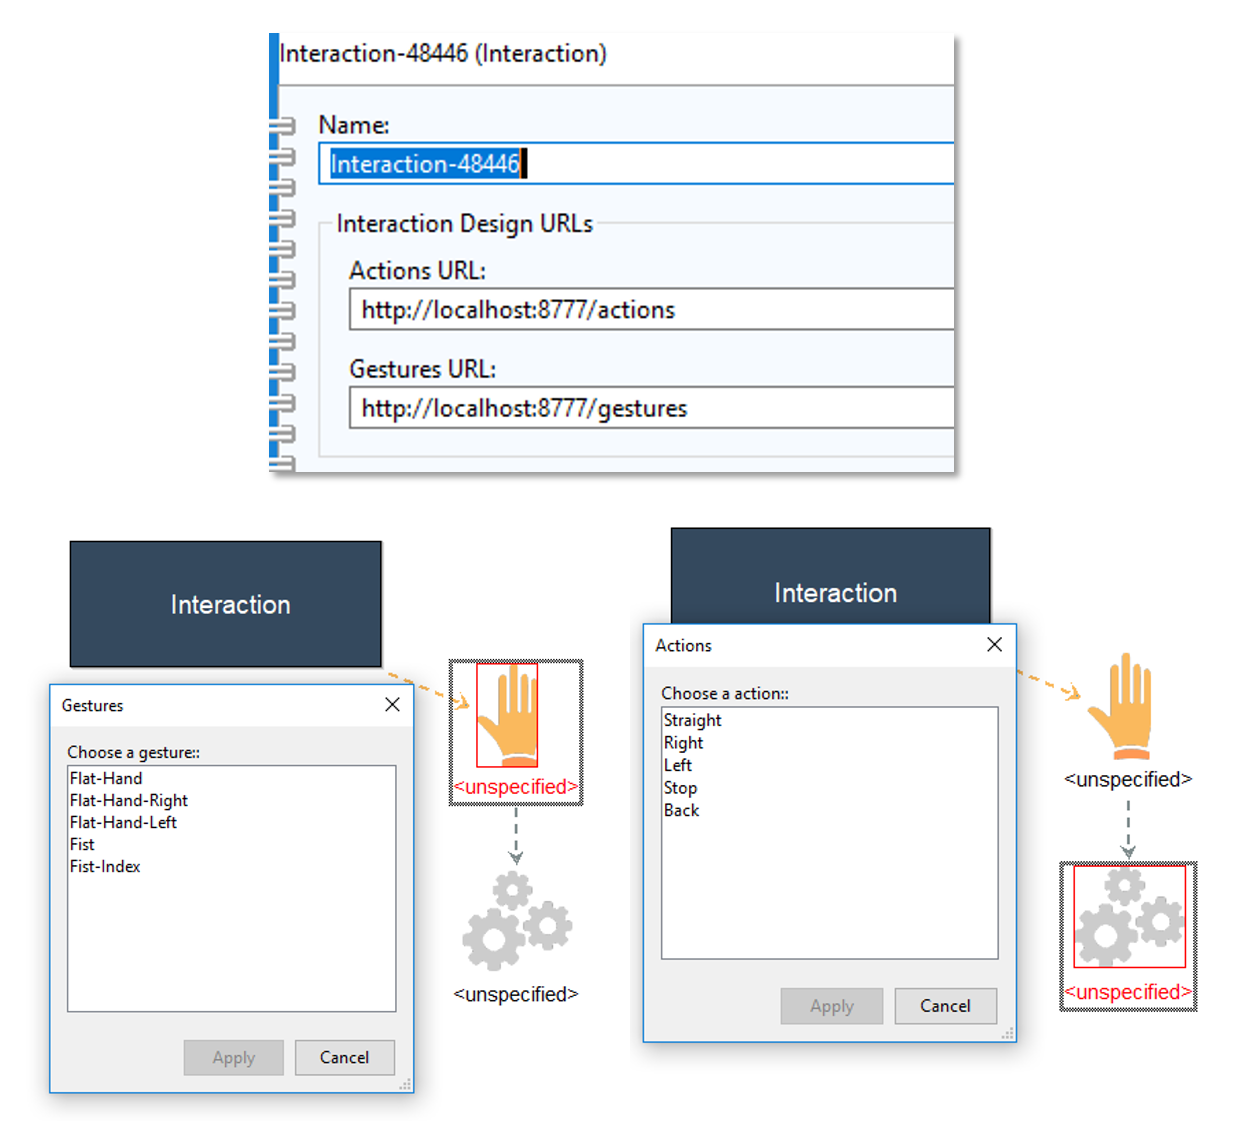
In addition, the modelling method has the possibility to receive the currently available gestures and actions from the CPS Service. The URLs of the services need to be set in the Interaction instance, as shown bellow. As a result, one now can choose a value from a list provided by the service. However, it is permitted to also manually type in values.
The functionality for exporting, importing smart models and setting values for instances is found under the menu Mechanisms in the modelling toolkit
CPS Service
The CPS service’s sole purpose is to provide an interface for exchanging data regarding the smart models and communication via gestures. The service has been implemented using NodeJS. The available resources are depicted bellow:
- GET /gestures returns a list of gestures delimited with a semikolon
- GET /actions returns a list of actions delimited with a semikolon
- GET /interface returns the interface to commincate with the CPS with gestures as an HTML document
- GET /interactiondesign returns the interaction ontology (smart model) as (RDF) XML
- GET /interactiondesign/upload returns an interface for uploading interaction ontologies
- POST /interactiondesign/upload for posting interaction ontology files
To start this service, change into the ./webservice folder from the root folder of this project and run npm install and then node rest. The service should be accessible via localhost on port 8777.
Gesture Classifier
The gesture classifier has been built using Support Vector Machines (SVM). The classifier has been trained on hand gesture frames, after applying the method Histogram of ordiented Gradients (HOG) on the frames for feature extraction. The entire implementation is done in Python 3 using OpenCV, SciKit-Learn and NumPy.
Furthermore an environment for constructing custom classifiers is provided, which covers all necessary steps to construct a gesture classifier. The basic workflow consists of the following steps
Collect Images: With ./image_collector.py one can collect images of size 300×330 pixels. It takes two command line arguments, namely, the name of the gesture and the number of snapshots to take. The images are saved in ./imgdata under the provided gesture name. Previous images are not overwritten.
The images are labeled with numbers, starting from the highest number found in the gesture’s image collection. Once the program has been started, a window will appear with the webcam video feed. Every few seconds, indicated by the count down, the program will save a snapshot of the marked area in the window.
Extract Features: In this step we construct the feature vectors for each image in our collection, which then are used to train the classifier. In our case, we apply histogram of oriented gradients to extract our features. For this we need to run ./hog_feature_extractor.py . Prior to starting the program, all the folder names of the desired gestures from the collection need to be added to the variable categories in the ./hog_feature_extractor.py file.
This program produces three files in /imgdata: xdata.npy (array of feature vectors), ydata.npy (array of labels as integer), and ylabel.npy (array of unique labels, index corresponds to integer label).
Train Classifier: The classifier progam ./train_svm.py takes one commandline argument, namely the mode search or train. In either case the program uses the .npy files, exported from the previous step.
The search mode enables to measure the performance with 5-fold cross-validation using a number of different kernels, such as linear or radial, and different parameterisation. The results are printed in the console upon execution.
The train mode actually trains the model on the entire imported trainingset (.npy) and exports a classifier in the root folder ./svm_gai.pkl. By default, the kernel is set to linear with C set to 1, as this in combination with our setup of HOG, mostly yields decent results.
Live Interaction
The objective of the live interaction is to capture the gestures via a camera, then apply the trained classifier to identify the gestures, then use this classification result to figure out the action to carry out from the smart model. Finally the action needs to be carried out.
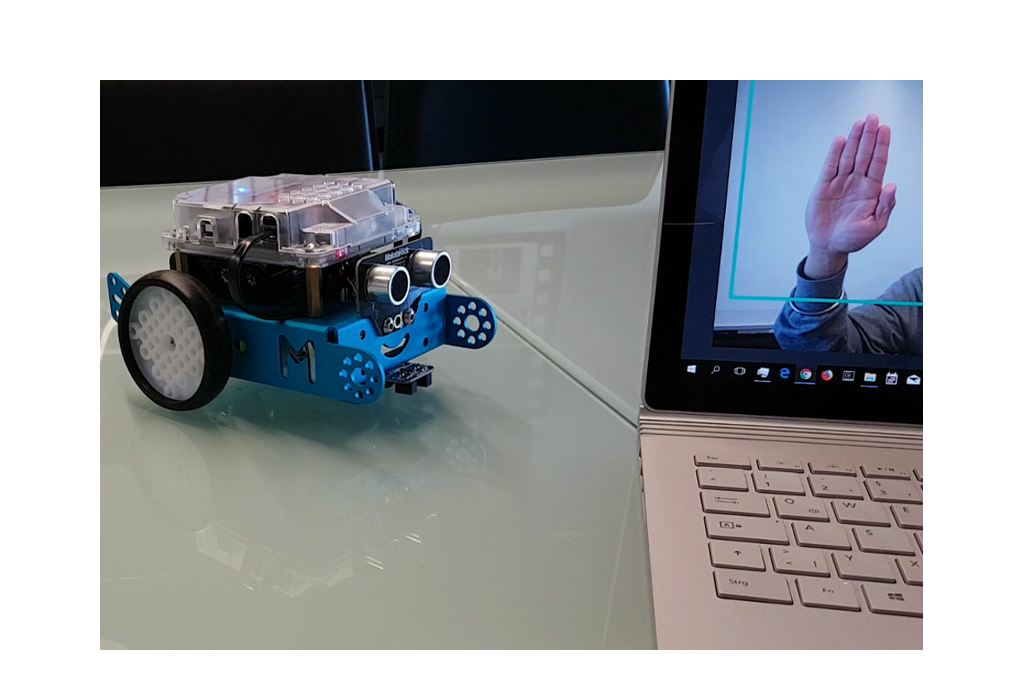
In our case a normal laptop computer with integrated webcam, with a resolution of 720p, and a Mbot is used. Together, they represent our CPS. All computations and video related tasks are carried out on the computer, the Mbot only receives the commands for its movements.
At first the Mbot needs to be connected to the computer via BlueTooth. Once this has been done, change from the root folder into the folder ./action_devices_api/mbot and run java -cp "py4j0.10.6.jar;MBotJava-1.0-SNAPSHOT.jar;." GaiMbotController
Note that the MbotJava Jar has been created from here. Since this only offers a Java based interface to interact with Mbots, we use the library Py4J, which enables us to interact with Java objects from Python. The Jar file for Py4J is provided with this project.
To be able to tell which actions need to be executed, our interaction ontology needs to be placed at ./upload_ontology as gai_onto.rdf. An example ontology is also already provided at this location.
In the final step we need to run the program ./live_recognition.py from the root dir. This program glues all the pieces we have discussed up until now together. Initially it starts-up a webserver for relaying the webcam feed and communicating with a user, and sets up the Mbot object to communicate with the previously started Mbot interface with Java.
After this there are two possibilties to call up the web interface for the gesture interaction: either start up the CPS service and call the resource /interface, or directly open the ./live_interface.html file in a Web browser.
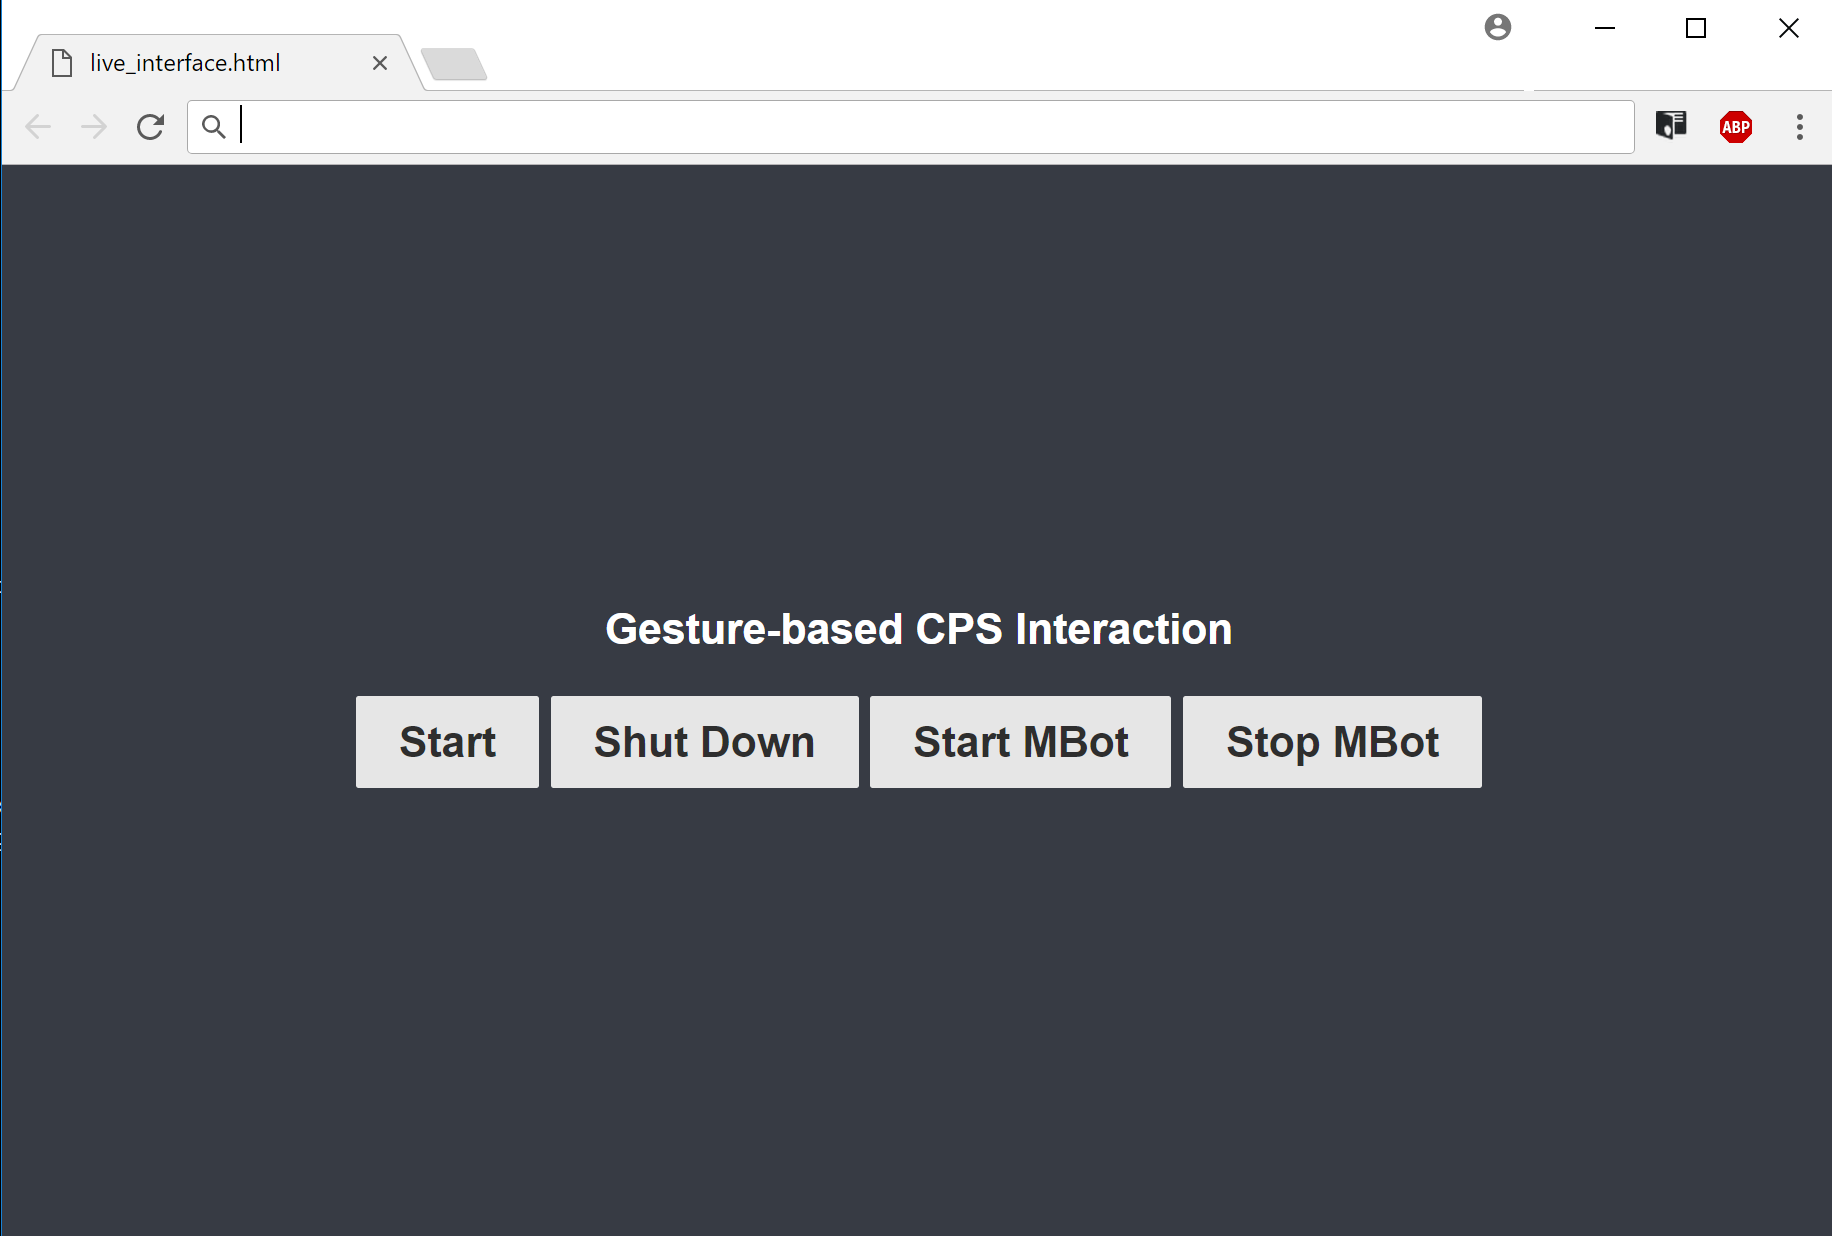
The communication and webcam relay between the web interface and live_recognition.py server is done via web sockets running on port 8899. Upon clicking on the Start Button of the web interface, the live_recognition.py server imports the ontology and the trained classifier, and then starts processing the webcam feed, while also relaying it to the web interface. The results of the classification are also returned as part of the video frames. The Shut Down Button ends the processing of the video stream. In addition Start MBot and Stop Mbot Buttons control, whether the MBot should be used. By default, the Mbot is not activated to be used with gestures.
Results
At last a video of a live demonstration has been made, which demonstrates the overall success of this project. All defined objectives have been accomplished. As we can see, the detection of the hand gestures works almost perfectly and in real-time, given the fact, that only 10 images per gesture have been used to train the classifier.
However, there are also aspects that may be addressed in future:
- Combine classifiers with different feature extraction methods (ensemble)
- Create a shared database for gestures to increase the quality of the training process
- Create an environment to learn gestures on the fly (via an interactive interface)
