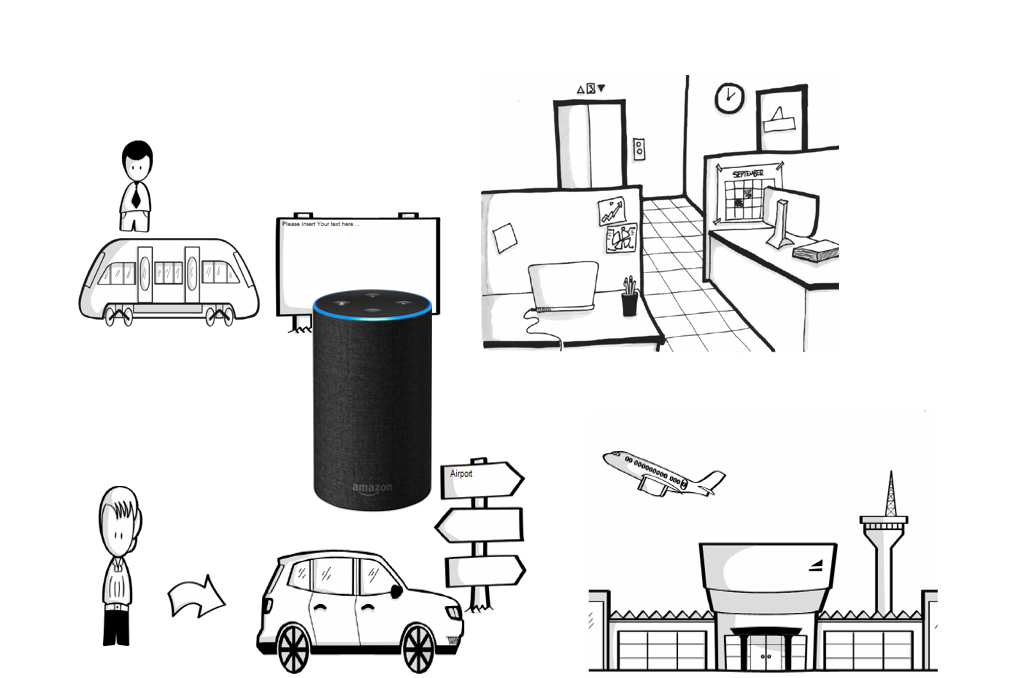
Use Case
The goal of this project is to modify a model of the Scene2Model application with speech input.
The user needs a speech recognition-enabled device (in this case an Amazon Echo together with the Alexa software were used) to tell the application which changes on the model he/she would like to make. The system listens on the user’s commands and the input and loads the gained information to a cloud storage in the pattern of a CSV file. The Scene2Model application uses then an Adoscript code to load the information and change the current model o fit the user’s input.
There are three main Use Cases in this project.
Speech Recognition
To get all the information of the user’s input it is important to distinguish between the commands the user said, like ‘Add’ or ‘Change’, and the free speech of the user for descriptions or text fields in the model. Therefore, the user needs first to say, for example, which element he/she would like to modify. After that he/she can tell what parts of the element should be changed.
Convert information
After the user finished his/her input, the application sends them to the server where the information gets split and convert into the right format.
After the formatting the application stores the data into a CSV file and loads it to a cloud storage.
Change Model
To change the model the Scene2Model application loads the data from the cloud storage.
It uses an Adoscript file to gather the data and then checks them to verify that the changes, the user wants, are possible.
If the are possible the changes will be made to the elements and displayed to the user via the user interface from the Scene2Model application.
Experiment
To make the experiment easy understandable and reproducible we will show all steps that must be made to execute the project.
For the realization of this project we used an Amazon Echo device in combination with the Alexa software for the speech recognition, an AWS Lambda function with python for the execution, an AWS S3 Bucket as cloud storage and Adoscript for the Sceen2Model manipulation.
First, we will have a look at how the interaction of the user, the speech recognition-enabled device, the server and Scene2Model is working.
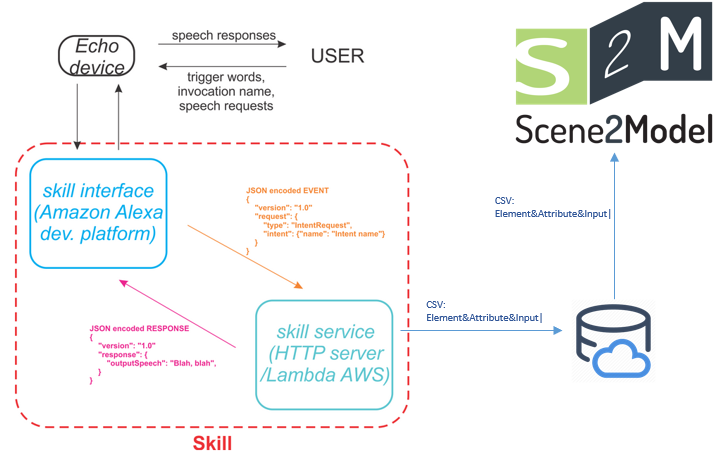
As it can be seen in the figure above, the user gives a speech input into the device. The device is connected with the speech recognition software, which will capture the input and send it to server in a JSON format. The server creates an CSV file with all the important information and loads it into a cloud storage. The Scene2Model application loads the CSV file from the cloud storage and modifies the current model.
Skill Interface (Interaction Model)
In the skill interface we specify the trigger phrases for the invocation, intents and utterances.
- Invocation: is the name we say to Alexa to start the application. For example “Alexa, start Omirob”
- Intents: handles the user input and specify the type of input like free speech or specific values.
- Utterances: are the triggers for the intents. For example “Add the description”.
The Skill converts those inputs into an JSON format and sent them to the server (in this case an AWS Lambda Function).
AWS Lambda Function
The Lambda function receives the triggered event in JSON format from the Skill and returns a response depending on the input. In these events is specified how the user interacts with the Skill (what the user wants the Skill to do).
In this project we were realising the functions in Python. The Python code receives the input information, stores them into the cloud storage and returns a response to the user, which is executed by the “Echo” device.
Scene2Model
First, we added a new button, called “Alexa”, into the Scene2Model application.
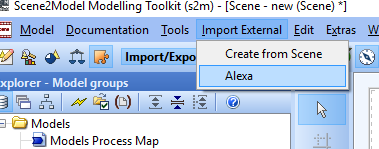
By clicking this button an Adoscript file will be triggered which loads the data from the cloud storage.
Before modifying the model, the Adoscript file checks if the modifications are possible or not.
Voice Control
The Phrases to start the Skill are:
- Start Omirob
- Omirob
To modify the model:
- The name of each element is the identifier. So, it must be unique.
- Change “element you wish to modify”
- The name of each element is the identifier. So, it must be unique.
- Add the role “role name”
- Add the description “your description”
- Add the type “type”
- Add the text “text”
- How can I make changes to an object?
- How can I add an “attribute”?
- etc.
Execution of the Skill
- Pull the project from here https://gitlab.dke.univie.ac.at/edu-semtech/scene2model_voice_control/
- Login/Register by ADS (https://developer.amazon.com/de?)
- Navigate to the “ALEXA” menu
- Click on “Alexa Skills Kit”
- Click on “Start a Skill”
- Click on “Create Skill”
- Set Skill name to “Omirob”
- Select “Custom” and “Self Hosted” à Click on “Create Skill”
- Select “Start from scratch” and click “Choose”
- Go to the “JSON Editor” and copy/drop the “AlexaSkillKit.json” that you downloaded in the first step (root folder)
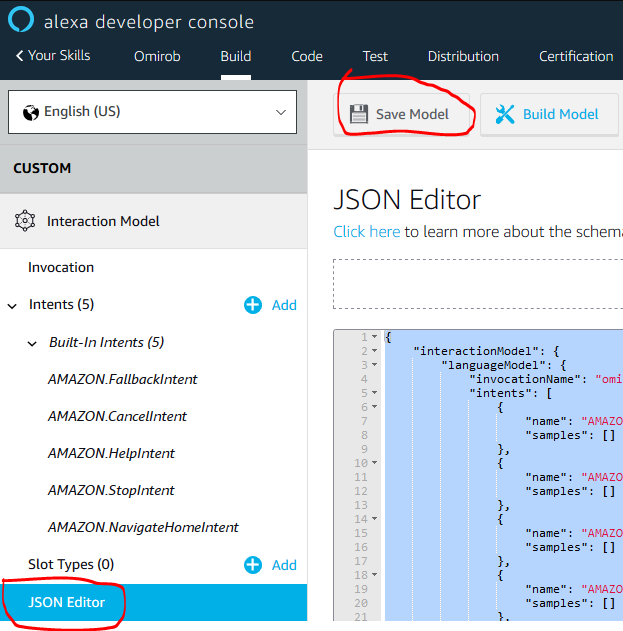
- Navigate to the “Endpoints” tab
- Select “AWS Lambda function” and copy “Your Skill ID” (this can be replaced if you prefer to use an HTTPS Server)
- Go into your ADS account (https://developer.amazon.com/de?) and click on AWS
- Select in the upper right corner “North Virginia” (ATM it’s in a test phase and here you make the ASK trigger available to the Lambda function)
- Search for Lambda and click on it

- Create a new function
- Choose “Create from scratch”
- Give a name in the “Name” field and choose Python 3.6 for “Runtime”
- In “Role” select “Custom Role” (The IAM manager should open automatically)
- In IAM Manager make sure “lambda_basic_execution” is selected, then click on “Allow” (If you want to use the S3Bucket make sure to add the “AmazonS3FullAccess” and the “CloudWatchFullAccess” to your Role)
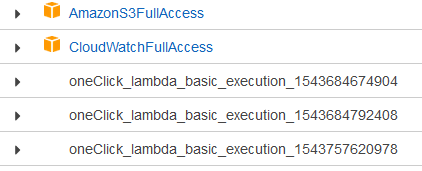
- You should be redirected à click on “Create function”
- In the “Add trigger” list select “Alexa Skill Kit” (and if you want to use S3Bucket as cloud storage, select also S3)

- Scroll down and enter the “Skill ID” (The ID you’ve copied in the Endpoints)àClick Add
- Copy the code from the “lambda_function.py” file into the editor.
- Copy ARN ID in the upper right corner
- Go back to the Alexa Development Consol and navigate to the Endpoints
- Paste the ARN into the “Default Region” field
- Click on “Build Model”
- Open the ADOxx Development Toolkit and paste the code from “external_coupling.asc” into the Library attributes
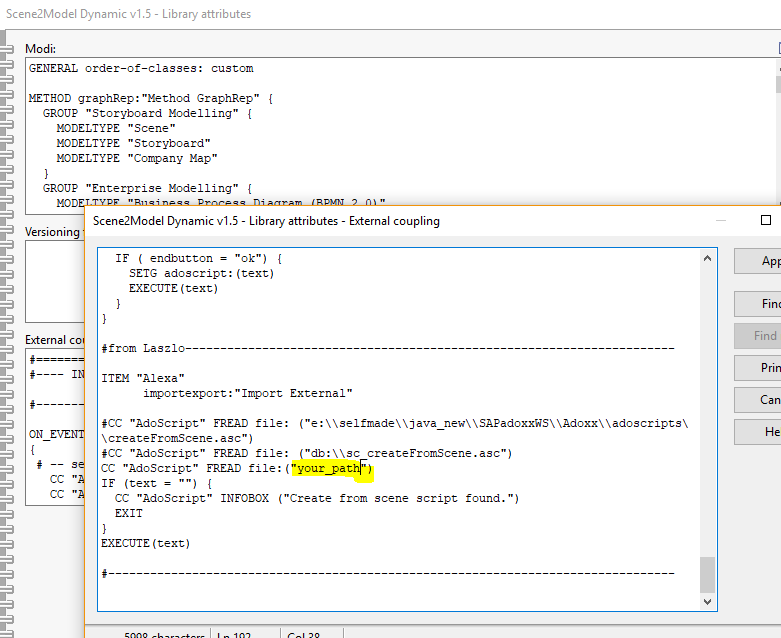
- Make sure the path is set to the location where you downloaded the project in the first step
- Change path and keys in “download_s3_bucket_file .py” to your cloud storage (Change “download_s3_bucket_file.py” if you want to use another cloud storage)
- Now you can start the Skill from the Alexa Development Consol, give your input via speech and modify your model by clicking the button “Import External”–> “Alexa”
Results
The following video shows a short example of the result. You can see the interaction between the user, the Speech Recognition Application, the Server and the Scene2Model application. (Not all possibilities are shown in this video)
Future Work
There are some extensions for this project that can be implemented in the future.
The most obvious one is to extend the functions, that can be control via speech input. For example, to add an element or to move it in a specific direction. Also, to extend the utterances to let the interaction with the device feel more like a normal conversation.
Another extension is to realize the speech recognition and the converting of the input possible for different devices and systems. So, that the user does not need a specific device to execute the project.
Creating a new model and to enable real-time modification on a model are further works for the future that could be realised.
